Blog
Anatomy of a Typical Toilet Tank Interior
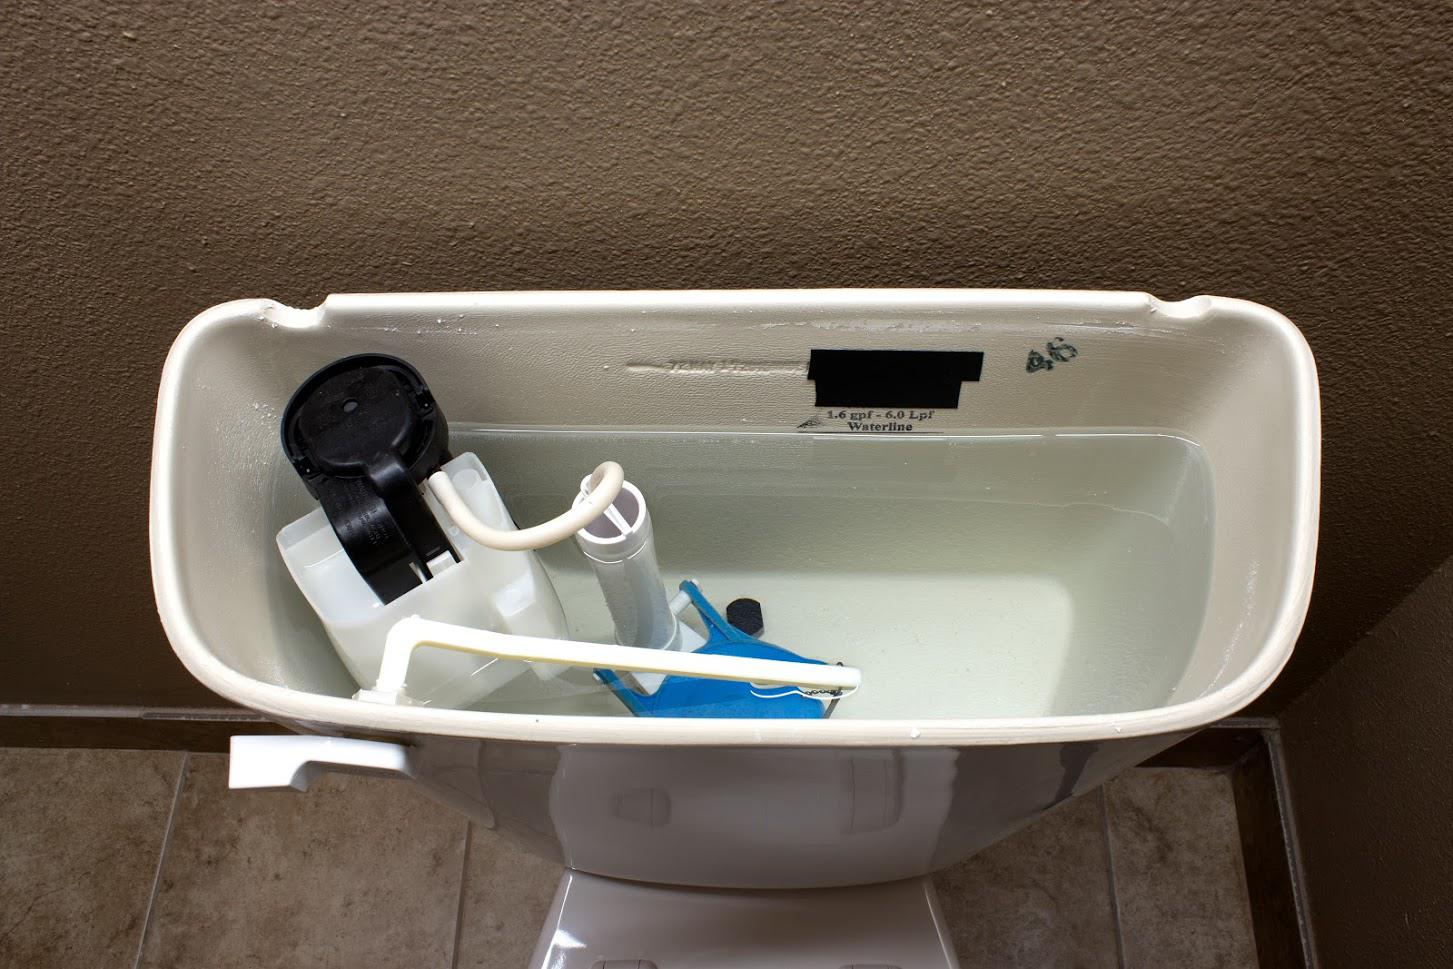
Whether you have a toilet leak or you just want to know how to care for your toilet or save on water use, knowing what's inside the tank is critical. The pieces inside the tank work a certain way, and most standard toilets look very similar on the inside. (Keep in mind that pressure-assisted flush toilets or low-flow toilets may have different designs.)
Here are five critical parts of a typical toilet tank's anatomy.
1. Rubber Flapper
The round, flat rubber flapper covers the hole at the bottom of the tank where water runs out to the toilet bowl when you flush. Because it's plastic, this flapper is a common point of failure. The rubber can eventually start to crack and lose its tight seal, a process which may accelerate if you use cleaners in your toilet tank.
Fortunately, whether you go for DIY or a professional repair, replacing the flapper is usually a relatively straightforward prospect.
2. Fill Valve
The fill valve regulates water coming into the tank to refill it after a flush. It also sends water to the toilet bowl at the same time. Many toilets aren't very efficient about this process. If you'd like to save water, you can have your plumber install a special adjustable fill valve that distributes water more evenly and wastes less.
3. Fill Float
The fill float is the mechanism that tells the fill valve when to turn on. This float sits on top of the water, meaning that when the water level goes down (such as when you flush), the float falls with it, pulling down on the lever that turns the fill valve on.
The mechanism also has an adjustment screw you can use adjust the level at which the fill valve engages. But you need to keep in mind a couple things while doing so.
If you adjust it too far up, the proposed water level will be higher than the overflow tube, meaning the tank will fill and drain at the same time and run constantly.
If you adjust the float downward, you can decrease the amount of water your tank uses. But if the tank is not designed to flush with low water flow, this water-saving move could backfire since you might end up flushing multiple times due to an insufficient flush.
4. Flush Lever and Chain
The flush lever and chain assembly attach to the inside of the external flushing mechanism. The other end of the chain pulls up on the rubber flapper when you push down to flush. With the flapper out of the way, water rushes out of the tank and into the bowl, using gravity to flush the bowl out.
Typically, the chain is adjustable, and if incorrectly adjusted, it can cause problems. For example, if the chain is too long, it can catch under the flapper, keeping a seal from forming. This allows the tank to leak and may cause constant running.
5. Overflow Tube
The overflow tube has multiple purposes. During a tank refill, some water goes down the overflow tube and into the toilet bowl, since the water levels are low in both the tank and the bowl after a flush. Another purpose is that if the water level in the tank ever gets too high, the overflow tube directs it out of the tank so the tank won't spill and cause water damage.
These are the five main components you'll find inside a typical toilet tank. As you can see, some of them are easier to repair or replace when they go bad than others are. If your toilet doesn’t function correctly or if you'd like to optimize your toilet tank for reduced water usage, get in touch with Complete Plumbing today.
Installation
Services
and Military Discount


